


How to Install a Heavy Duty 400A+ Solenoid for Your Golf Cart (Easy Step-by-Step Guide)
Upgrading to a heavy-duty solenoid is a common modification for golf carts, especially when adding performance upgrades like a high-output controller or motor. A heavy-duty solenoid can handle more current than the factory unit, improving reliability and reducing the risk of overheating.
In this guide, I’ll walk you through the process of wiring a heavy-duty solenoid into your golf cart, based on a Club Car installation. Even if you’re working on a different model, the steps will be very similar.
Why Upgrade to a Heavy-Duty Solenoid?
-
Increased durability – Built to handle higher current loads.
-
Better performance – Supports upgraded controllers and motors.
-
Longer lifespan – Less risk of overheating or failure compared to the factory unit.
Tools and Parts You’ll Need
-
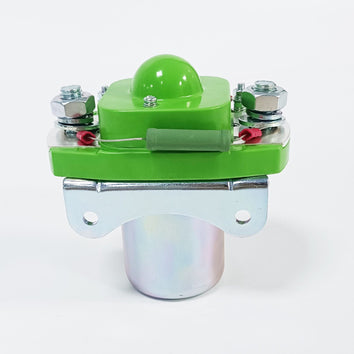
Heavy-duty solenoid (larger than stock, with big studs)
-
Heavy-duty resistor (to match the solenoid)
-
Heavy-duty diode (if required by your solenoid)
-
Ring terminals (to replace factory spade connectors)
-
Drill and drill bits (for mounting holes and, if needed, enlarging cable lugs)
-
Basic hand tools (wrenches, socket set, wire crimper)
Safety tip: Always disconnect the battery pack before starting. Working with live wiring can be dangerous.
Step-by-Step Installation
1. Find a Mounting Spot
Heavy-duty solenoids are physically larger than factory units. Because of this, you’ll often need to choose a new mounting location. Make sure the spot has enough clearance for the larger housing and terminals.
2. Drill the Mounting Holes
Once you’ve picked a location, drill mounting holes for the solenoid bracket. This ensures the solenoid is securely fastened and won’t vibrate loose while driving.
3. Wire It the Same as Factory
The key rule: wire the new solenoid exactly the same way as the factory solenoid.
Every wire should go to the same corresponding terminal. This ensures the electrical system functions correctly with no surprises.
4. Install a Heavy-Duty Resistor
Most factory resistors are too small for a heavy-duty solenoid. Replace it with a heavy-duty resistor to match the solenoid. This helps control the inrush current and prevents damage.
5. Add a Diode (If Needed)
Some solenoids require a diode across the small terminals. If yours does, make sure you use a heavy-duty diode for compatibility.
(In the video example, the solenoid didn’t require one.)
6. Upgrade the Connectors
Many factory solenoids use spade connectors, while heavy-duty solenoids typically use ring terminals. Cut off the old connectors and crimp on ring terminals for a more secure connection.
7. Adjust Cable Lugs if Necessary
Because heavy-duty solenoids use larger studs, the stock cable lugs may not fit. In that case, drill out the lug holes slightly so they slide over the studs properly. Take care not to weaken the cable ends.
8. Secure Everything
With all wiring and components in place, mount the solenoid and tighten all connections. Loose wires can cause electrical resistance and heat buildup, so double-check that everything is snug.
9. Reconnect Power and Test
Once everything looks good, reconnect the battery pack and test the cart. Listen for the solenoid click and ensure the cart drives normally.
Final Thoughts
Upgrading to a heavy-duty solenoid is a relatively simple modification that pays off in durability and reliability. Just remember:
-
Mount securely
-
Match wiring exactly
-
Use the proper resistor and diode
-
Upgrade your connectors
With those steps done, your golf cart will be ready to handle higher loads and last longer on the course—or off-road.
Related Products

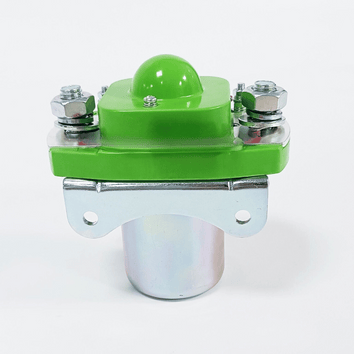
Vendor: 48V/36V VOLT HEAVY DUTY 400+ AMP SOLENOID

Vendor: Bolt 72V Solenoid
Vendor: 48V/36V Heavy Duty 400+amp Solenoid - ADD-ON ONLY SPECIAL for AC Conversion Kits


