


How to Winterize Your Golf Cart (Lithium & Lead-Acid Battery Storage Guide)

Golf carts aren’t just for the golf course anymore. They’re used in communities, farms, hunting grounds, resorts, and neighborhoods. But when temperatures drop, your cart faces serious risks if it’s left unprepared.
Cold weather can:
➤ Crack batteries and wiring
➤ Rust metal components
➤ Flatten tires
➤ Damage upholstery and enclosures
Winterizing your golf cart extends its life, prevents costly repairs, and ensures it’s ready to roll the moment spring arrives. This applies to all cart brands, whether it's EZGO, Club Car, Yamaha, ICON, Evolution, and more.
To make sure nothing is overlooked, we’ve broken down the winter prep process into six essential steps. Following this step-by-step guide will protect your investment, prevent costly damage, and ensure your golf cart is ready to hit the course (or trails) the moment spring arrives.
Step 1: Clean and Dry Your Golf Cart
Why Cleaning Matters
A golf cart’s exterior and internal compartments may seem rugged, but dirt, leaves, and moisture can quietly cause serious damage over the winter months. When debris gets trapped under seats, inside battery trays, or around bolts and hinges, it holds moisture against metal surfaces. This creates the perfect environment for rust, corrosion, and mildew, which can degrade both the frame and critical electrical components over time. Even small pockets of grime can lead to battery tray corrosion, reducing battery life and potentially causing costly repairs.
Regular, thorough cleaning ensures that moisture doesn’t accumulate, prolongs the life of metal and plastic components, and keeps the cart looking and functioning like new. Skipping this step might seem harmless, but by spring, those hidden pockets of moisture and debris could mean stuck hinges, corroded terminals, or worse -- a cart that won’t start.
Cleaning Tips
-
Wash with mild soap and water: Avoid harsh chemicals or strong detergents that can strip protective coatings or damage paint finishes.
-
Focus on hidden areas: Underbodies, battery trays, and bolts are prime spots where dirt and moisture collect. Scrub gently with a brush to remove stubborn debris.
-
Don’t forget the obvious spots: Clean floor mats, roof surfaces, and seats to remove accumulated dust, sap, or grime.
-
Clear wheel wells and cargo areas: Leaves, grass, and mud often collect here, especially after fall and early winter. Remove everything to prevent rot or rust formation.
-
Inspect hinges and joints: Seat hinges, folding roofs, and linkages can trap dirt. Wipe and brush out debris to maintain smooth movement.
Safety Note:
Avoid using high-pressure washers near battery compartments or lithium battery bays. Excessive water can seep into electrical connections or battery seals, causing shorts or corrosion. When cleaning these areas, a damp cloth is safer and just as effective.
Step 2: Battery Prep – Lithium vs. Lead-Acid
Proper battery care is arguably the most critical part of winterizing your golf cart. Batteries are expensive, and neglect during storage can lead to reduced lifespan, performance issues, or even complete failure. How you store your battery depends on the type, whether it's a lithium or lead-acid, as each has unique requirements.
Lithium Batteries

Lithium batteries are increasingly common in modern golf carts due to their lightweight design, long cycle life, and low self-discharge rate. Despite these advantages, improper storage can still cause damage.
Steps for Lithium Battery Storage:
-
Charge to 80–100% before storage: Unlike lead-acid, lithium batteries can hold their charge for months with minimal drain, but a full charge ensures the battery is ready for long-term storage.
-
Power down using the main battery switch: Always ensure the battery is completely powered off to prevent parasitic drain from the cart’s electronics.
-
Check charge every 1–2 months: Even with low self-discharge, lithium batteries benefit from periodic monitoring. If the voltage drops, top it off to maintain optimal health.
Pro Tips:
-
Indoor storage is ideal: Keep the battery away from extreme temperatures, condensation, and direct sunlight.
-
Outdoor storage precautions: If you must store the battery outside, remove it from the cart and bring it indoors. Exposure to freezing temperatures or moisture can damage cells and seals.
-
Charging in cold weather: Never charge a lithium battery in sub-freezing conditions unless it’s a self-heating model. Charging in the cold can cause internal cell damage and reduce lifespan.
Lead-Acid Batteries

Lead-acid batteries remain widely used in older or utility golf carts. While they’re reliable, they require more active maintenance during winter storage.
Steps for Lead-Acid Battery Storage:
-
Fully charge before storage: Lead-acid batteries naturally self-discharge faster than lithium. A full charge prevents sulfation, which can permanently reduce capacity.
-
Clean terminals with baking soda + water: This neutralizes acid residue and prevents corrosion that can interfere with charging and connections.
-
Disconnect both positive and negative cables: This eliminates parasitic draws from the cart’s electronics during storage.
-
Top off with distilled water after charging: Only add distilled water to cells that are below recommended levels to maintain proper electrolyte balance.
-
Use a smart charger if maintaining charge: Trickle chargers are less effective and can overcharge, but a smart charger keeps the battery topped off safely.
-
Recharge every 30–45 days if disconnected: Regular charging ensures the battery doesn’t drop below safe voltage, which can cause permanent damage.
Why This Matters:
Skipping proper battery storage is one of the fastest ways to ruin a golf cart over winter. For lithium, cold exposure can freeze cells, reduce performance, and compromise warranty coverage. For lead-acid, sulfation, corrosion, or low water levels can leave you with a battery that won’t start your cart come spring. By following these steps, you preserve battery health, lifespan, and performance, ensuring your golf cart is ready to go as soon as warmer weather arrives.
Step 3: Lubricate All Moving Parts

While cleaning and battery prep protect your golf cart’s exterior and power system, lubrication ensures smooth operation and prevents corrosion in mechanical components. Even if your cart sits idle for months, unlubricated parts can seize, rust, or wear prematurely, leading to costly repairs in the spring.
Why Lubrication Matters
Moisture, cold temperatures, and inactivity cause metal pivots, hinges, and linkages to dry out. Over time, this can result in:
➤ Stiff accelerator or brake pedals
➤ Squeaky or stuck seat hinges
➤ Jammed folding windshields and doors
➤ Hard-to-turn steering locks
Lubricating these parts not only prevents rust and freeze-up, but it also reduces friction, ensuring your cart operates quietly and efficiently after storage.
Key Components to Lubricate
1. Accelerator and Brake Pedal Pivots
These areas experience constant movement and load. A light coat of white lithium grease or silicone spray ensures smooth, responsive pedal action.
2. Cables and Brake Linkages
Brake and throttle cables are prone to corrosion if exposed to moisture. Lubricate the entire length of accessible cables to prevent sticking.
3. Rear Seat Hinges
Hinges supporting folding or removable seats can rust or seize. Apply grease or anti-rust spray to maintain full movement.
4. Folding Windshields and Door Zippers
Moving parts in windshields, doors, or retractable roofs are vulnerable to stiffness in cold weather. Silicone sprays penetrate and protect these surfaces.
5. Keyholes and Locking Mechanisms
Locks often fail in winter due to moisture and rust. A small dab of graphite powder or silicone-based lubricant keeps ignition, storage, and steering locks functioning smoothly.
Recommended Products
Silicone spray: Ideal for plastic or rubber components; prevents sticking without attracting dirt.
White lithium grease: Best for metal-to-metal contact points, including hinges and linkages.
Anti-rust coating: Apply lightly on exposed metal areas for extra protection against corrosion.
Pro Tip:
Don’t over-lubricate! Too much grease or oil can attract dust and grime, which defeats the purpose. Focus on thin, even layers and wipe off excess.
Proper lubrication combined with cleaning and battery care ensures that your golf cart will start and operate smoothly after months of storage, avoiding common springtime frustrations like stiff pedals, jammed seats, or squeaky hinges.
Step 4: Inspect Tires & Brakes

After cleaning, battery care, and lubrication, the next critical step is ensuring your tires and brakes are winter-ready. Cold weather can negatively impact both, and neglecting them can lead to flat spots, tire damage, or compromised braking performance.
Tires
Tires are one of the most overlooked components during winter storage, yet they play a vital role in safety and performance.
What to Do:
1. Inflate to the recommended PSI: Cold temperatures naturally reduce tire pressure, so check inflation before storing. Underinflated tires are more likely to develop flat spots and uneven wear.
2. Consider tire covers: UV rays, even in winter, can dry out sidewalls and degrade rubber. Covers protect against sunlight, frost, and debris.
3. Use jack stands for long-term storage: If your cart will sit in one position for several months, jack stands prevent flat spots and maintain tire shape.
4. Inspect for cracks or damage: Look for signs of dry rot, punctures, or worn tread before storage. Addressing small issues now prevents bigger problems later.
Pro Tip: Rotate the cart occasionally if jack stands aren’t used. Even a slight shift in weight helps avoid permanent flat spots.
Brakes
Brakes are safety-critical components and must be properly stored to maintain full function. Cold, inactivity, and moisture can lead to stiff cables, reduced responsiveness, or corrosion on metal parts.
Steps for Brake Prep:
Step 1: Test stopping power: Before storage, ensure brakes provide full stopping force. Weak brakes may indicate worn pads or fluid issues that should be addressed immediately.
Step 2: Leave the parking brake OFF: Engaging the brake can cause cables to freeze or stretch over time, especially in cold or humid conditions.
Step 3: Inspect brake pads and linkages: Look for uneven wear, rust, or dragging pads. Lubricate pivot points lightly if needed.
Step 4. Check for hydraulic fluid leaks (if applicable): Any leaks should be repaired before storage to avoid long-term damage or system failure.
Pro Tip: For carts with regenerative braking, switching the Run/Tow mode to Tow during storage can further prevent battery drain and reduce stress on brake components.
Proper tire and brake preparation ensures that when spring arrives, your golf cart is safe, ready to drive, and free from avoidable wear or damage. Skipping this step can turn a simple spring outing into a maintenance headache.
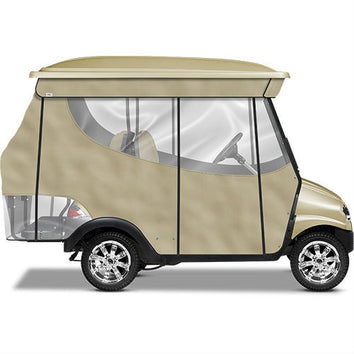
Step 5: Use an Enclosure or Cover

Protecting your golf cart from the elements is one of the most effective ways to prevent winter damage. Even a clean, fully serviced cart can suffer if exposed to snow, ice, rain, or UV rays for extended periods. Choosing the right cover or enclosure safeguards your cart’s paint, upholstery, battery, and mechanical components throughout the season.
Storage Covers
 Storage covers are the simplest and most cost-effective solution for protecting a cart during winter.
Key Features:
-
Look for Sunbrella fabric or marine-grade vinyl for durability and year-round protection.
-
Shields against rain, snow, sap, dust, and UV rays, which can fade paint and crack seats.
-
Lightweight and easy to remove, making it ideal for indoor or outdoor storage.
Pro Tip: Ensure the cover fits your make and model -- an EZGO TXT cover may not fit a lifted Yamaha Drive2. A snug fit reduces flapping in the wind and prevents debris from blowing underneath.
Over-the-Top Enclosures
 Over-the-top enclosures are ideal for carts that may still see occasional use during the winter months.
Benefits:
-
Fast installation using hooks, Velcro, or straps that secure under the cart.
-
Provides door and window coverage, keeping interiors dry and protected.
-
Flexible design accommodates carts with aftermarket seats, lift kits, or utility modifications.
Pro Tip: Make sure the enclosure covers the steering wheel, seats, and dashboard area to prevent frost or condensation buildup.
Track-Style Enclosures
 Track-style enclosures are semi-permanent or permanent solutions, designed for premium protection and fit.
Ideal For:
-
Lifted golf carts or carts used for hunting, farming, or utility purposes in winter.
-
Carts stored outdoors for long periods where a full-season shield is necessary.
Features to Look For:
-
Weather-sealed doors and panels (sold separately on some kits).
-
Track systems for secure attachment to the cart frame.
-
Custom fit for brands like EZGO TXT, Club Car DS, Yamaha Drive2, or other specialty carts.
Pro Tip: Measure your cart carefully before purchase, especially if it has a lift kit or aftermarket modifications. Proper fit ensures maximum protection and prevents damage from wind, snow, or ice accumulation.
Why This Step Matters
Even with cleaning, battery prep, and lubrication complete, exposure to the elements can undo all your hard work. Enclosures and covers shield your cart from moisture, ice, UV damage, and debris, significantly reducing the risk of rust, corrosion, or interior damage. Combined with proper storage location (Step 6), a quality cover is one of the most effective investments in long-term golf cart maintenance.
Step 6: Choose a Smart Storage Location
Even with cleaning, battery care, lubrication, and protective covers in place, where you store your golf cart is just as important. The right location prevents damage from moisture, temperature fluctuations, pests, and accidental impacts, ensuring your cart stays in peak condition throughout the winter.
Ideal Indoor Storage
Indoor storage is always the best option, especially for high-value carts or those with lithium batteries.
Characteristics of an Optimal Indoor Space:
-
Climate-controlled garage or warehouse: Maintains a stable temperature to prevent battery freeze, condensation, and material degradation.
-
Off the ground: Avoid placing your cart on grass or dirt, which can trap moisture and accelerate rust. Concrete, pavers, or a raised platform is ideal.
-
Covered and secure: Protects against dust, accidental impacts, or pest intrusion.
Pro Tip: If using a shared garage, ensure the cart is positioned away from heavy equipment, lawn tools, or vehicles to avoid dings and scratches during winter.
Outdoor Storage
If indoor storage isn’t an option, careful preparation can still protect your cart.
Best Practices for Outdoor Storage:
1. Park on a solid surface: Concrete, pavers, or asphalt prevents moisture from seeping into tires and the undercarriage.
2. Use wheel chocks, not the parking brake: Prevents stress on cables and avoids brake freeze.
3. Wrap steering wheel and seats: Covers reduce frost, UV damage, and moisture accumulation.
4. Secure the ignition or use a steering lock: Protects against theft or accidental use.
5. Combine with a high-quality cover or enclosure: Essential to protect against snow, rain, ice, and UV rays.
Pro Tip: If the cart will remain outdoors for extended periods, check periodically for ice buildup, debris, or water pooling around tires. This allows you to correct issues before they cause damage.
Why Storage Location Matters
Even the best cleaning, lubrication, and enclosure cannot fully protect a golf cart if it’s stored in a poorly chosen environment. Improper storage exposes the cart to:
-
Rust and corrosion from moisture
-
Battery damage from extreme temperatures
-
Tire flat spots from uneven surfaces
-
Pest damage to wiring and upholstery
By selecting a dry, stable, and secure location, you maximize the effectiveness of all previous winterization steps, ensuring your golf cart is ready to perform at its best when spring arrives.
Quick Golf Cart Winter Storage Checklist
With all the key winterization steps complete -- cleaning, battery care, lubrication, tire and brake checks, protective coverings, and smart storage -- you’re almost ready to put your golf cart into hibernation. However, even experienced owners can overlook small but critical details that ensure your cart emerges from winter in peak condition.
To make sure nothing is missed, we’ve compiled a Quick Storage Checklist. Think of it as a final walkthrough, a “winter-ready inspection” that confirms every system, component, and precaution is addressed. Here’s the checklist:
✔ Battery charged: 80–100% for lithium, 100% for lead-acid
✔ Power or terminals off: Main battery switch for lithium; positive and negative cables disconnected for lead-acid
✔ All moving parts lubricated: Pedals, hinges, cables, and locks
✔ Cart cleaned and dried: Underbody, battery tray, floor mats, seats, and wheel wells
✔ Tires inflated: To manufacturer-recommended PSI; consider jack stands for long-term storage
✔ Cover or enclosure installed: Sunbrella, marine vinyl, over-the-top, or track-style enclosure depending on your cart and environment
✔ Stored in a secure, dry location: Indoors preferred; outdoors on solid surface with wheel chocks if necessary
Protect Your Golf Cart Investment This Winter
Winterizing your golf cart isn’t just routine maintenance. It’s an investment in longevity, safety, and performance. By following these six essential steps, cleaning, battery care, lubrication, tire and brake inspection, protective coverings, and smart storage location, you drastically reduce the risk of rust, corrosion, battery damage, and mechanical issues.
Whether you own an EZGO TXT, Club Car DS, Yamaha Drive2, or a lifted utility cart, proper winter preparation ensures your cart is ready to hit the course, trails, or neighborhood roads the moment spring arrives. Neglecting even one step can lead to costly repairs or premature wear, turning a simple winter into a frustrating maintenance headache.
Frequently Asked Common Winter Storage Questions
Lithium: Never charge below freezing unless it’s a self-heating battery. Charging in cold can permanently damage cells.
Lead-acid: Can be charged outdoors, but indoor charging is safer to maintain electrolyte balance and battery life.
Related Products

Vendor: Storage Cover, Golf Cart with 80" Top and Rear Seat , Black

Vendor: DoubleTake Enclosure for 4 Passenger, 80" Top (Valance included)


Vendor: Odyssey Enclosure, 88" RHOX Top, for RHOX 88" Extended Top


