


How to Replace a Golf Cart Tail Light in 5 Simple Steps
Replace Your Golf Cart Tail Lights With a Complete LED Light Kit

For a reliable golf cart tail light replacement, replace the full lighting kit when your cart has aging rear lights, damaged wiring, or missing brake and turn-signal functions. Installing a complete, cart-specific golf cart light kit gives you matched headlights, rear light assemblies, a harness, and the connections needed to build a safer, cleaner system.
Before starting, confirm three things:
- Your cart model and year - Light housings and connectors differ between Club Car, E-Z-GO, and Yamaha carts.
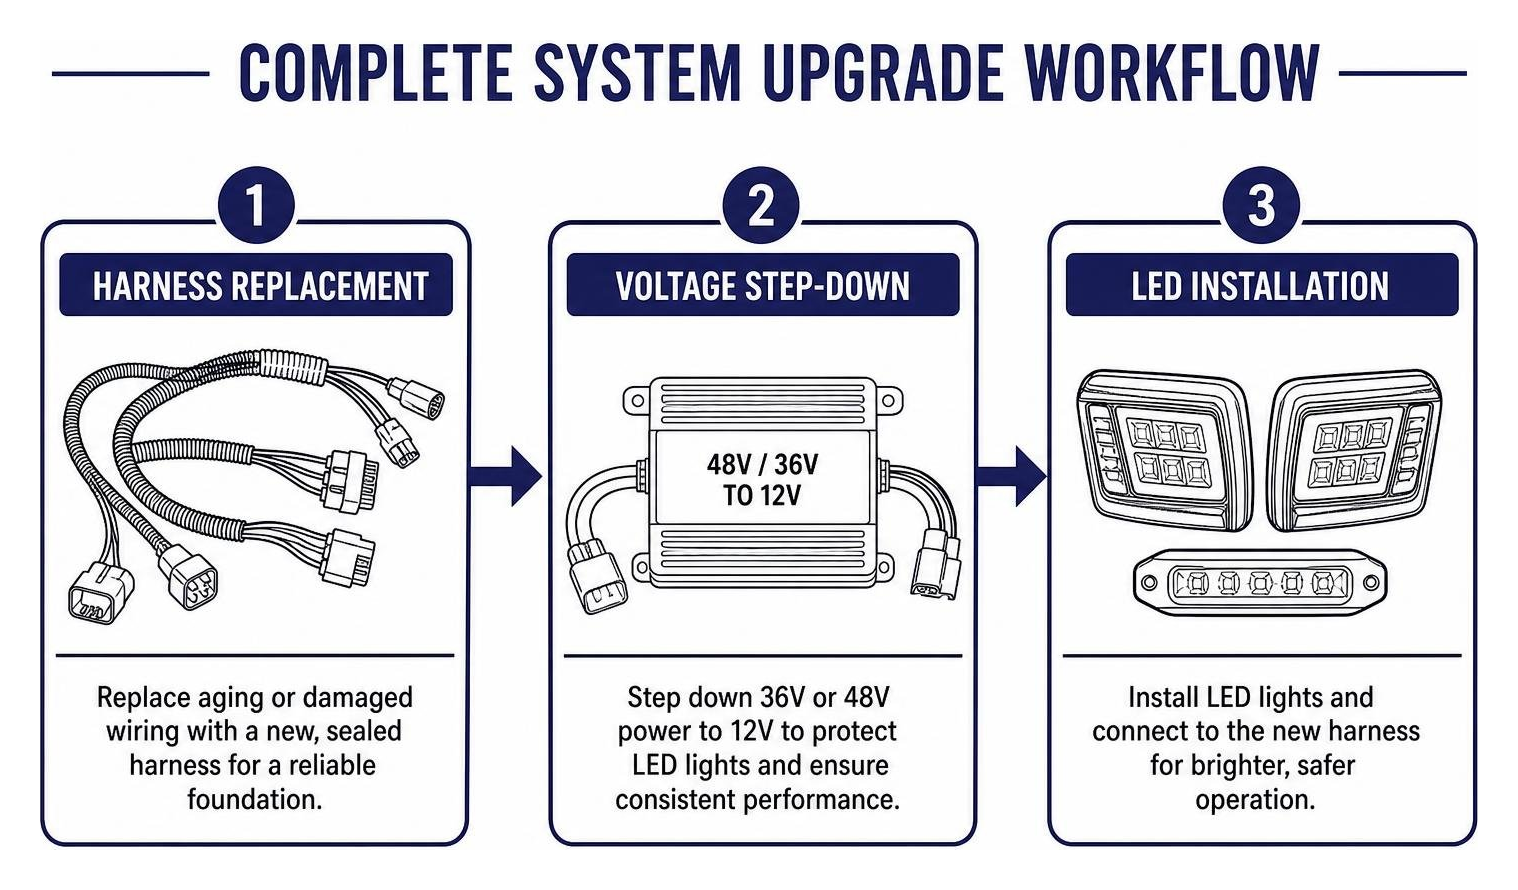
- Your lighting voltage - Most LED kits run on 12V. A 36V or 48V cart needs the correct voltage reduction unless the kit includes one.
- Your desired functions - Brake lights, a dedicated golf cart turn signal kit, and a license plate light may use separate wires or circuits.
For example, a 2022 Club Car Onward routes rear-light wiring through a dedicated channel, making a single-light repair more involved than removing two visible screws. Chasing and tapping one factory taillight circuit can mean working around protected wiring, older connections, and areas exposed to moisture and corrosion. A complete cart-specific kit lets you skip that piecemeal approach by replacing the rear circuit with a fresh sealed harness designed to run with the rest of the lighting system.
I am Martin Davis, owner of Extreme Kartz. Since 2022, I have worked with manufacturers, technicians, and cart owners to make golf cart tail light replacement and full lighting upgrades easier to understand, plan, and complete correctly. Orders are handled in 1–3 business days, making it simple to get your build underway.
Why a Full LED Upgrade Beats a Single Golf Cart Tail Light Replacement
When a single rear lamp burns out or suffers physical damage, the immediate instinct is to swap out that lone assembly. However, installing a complete front and rear lighting package often saves time, eliminates electrical imbalances, and upgrades your entire driving experience.
Older carts frequently feature brittle factory harnesses, oxidized connectors, and mixed bulb technologies. Splicing a modern LED assembly into a tired, corroded harness can cause uneven brightness, intermittent flickering, or ground faults. Replacing the entire setup gives your vehicle an integrated, modern electrical foundation that delivers balanced current distribution and dependable illumination.
Before beginning any wiring project, consulting your cart's specific factory diagram helps ensure proper circuit paths and factory pinouts are respected.
Upgrading to Complete Light Kits
Modern plug-and-play lighting systems remove the guesswork from wiring upgrades. Complete kits include precision-molded bezels, sealed wiring looms, and matching quick-connect terminals designed specifically for your cart's body style.
For Club Car owners, the Precedent LED Ultimate Light Kit Plus provides an all-in-one upgrade that ties together high/low beam functionality, daytime running lights, turn signals, and rear taillights. For E-Z-GO platforms, opting for an EZ GO TXT LED Deluxe Light Kit ensures your 1996–2013 TXT model receives modern LED illumination with a clean, factory-style fit.
MadJax Ultimate Plus light kits are real, cart-specific products for models including Precedent, RXV, TXT, and Drive, and they support 12–48V systems. A major advantage of these kits is that MadJax Ultimate Plus kits include a built-in voltage reducer and operate on 12–48V, so they do not require a separate converter. If you own a Club Car Precedent, note that the Club Car Precedent MadJax Ultimate Plus kit lists high/low-beam headlights, daytime running lights, self-canceling turn signals, a mechanical brake switch with timer, and dual USB ports, but does not list a horn.
Incandescent vs Modern LED Efficiency
Switching from legacy incandescent fixtures to LED technology delivers substantial electrical and operational benefits:
| Feature | Legacy Incandescent Bulbs | Modern LED Assemblies |
|---|---|---|
| Typical Power Consumption | ~20W to 25W per bulb | ~2W to 5W per assembly |
| Operating Lifespan | 1,000 – 2,000 operating hours | 25,000 – 50,000 operating hours |
| Circuit Draw & Heat | High thermal output, heavy amp load | Minimal heat dissipation, ultralow amp draw |
| Vibration Resistance | Fragile filaments prone to breaking | Solid-state electronics resistant to rough trails |
| Standard Operating Voltage | Strict 12V supply required | 12V (or broad 12–48V integrated support) |
By significantly reducing the amp draw on your 12V accessory circuit, LED assemblies preserve battery runtime while delivering crisper light output that ensures you remain visible in low-light neighborhood conditions.
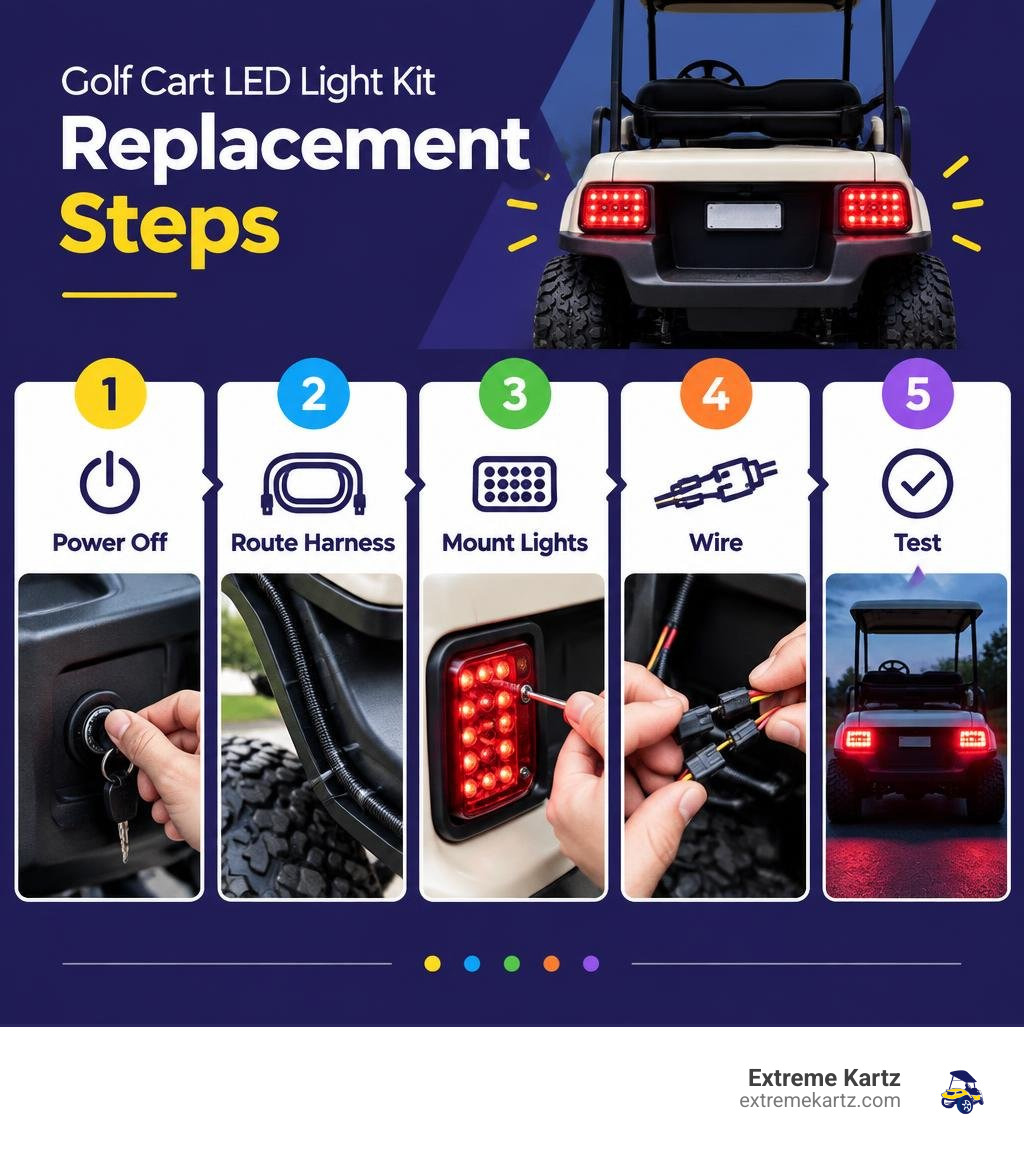
5 Steps to Install a Complete Golf Cart Light Upgrade

Upgrading your cart's lighting package is straightforward when following an organized, step-by-step procedure. Always take your time to ensure all wires are secured safely away from heat sources and moving suspension components.
Step 1: Disconnect Power and Ensure Electrical Safety
Safety is always the first priority when working on golf cart electrical systems.
- Switch the cart's Tow/Run switch to the TOW position (for electric models equipped with regenerative braking).
- Turn the ignition key switch to OFF and remove the key.
- Disconnect the main negative (-) battery cable from your battery pack to cut all electrical flow through the chassis. If your cart uses a modern lithium battery pack from approved brands such as Bolt Energy, Eco Battery, Lithium Rhino, or Bedrock Battery, follow the manufacturer's shutdown procedures before loosening battery terminal hardware.
Step 2: Route the Central Wire Harness
With the battery pack disconnected, lay out your central lighting harness along the cart's frame rail.
- Route the harness under the seat subframe and along the interior chassis channels, keeping clear of the steering linkage, accelerator rods, and brake cables.
- For E-Z-GO owners, utilizing a cart-specific Light Kit Harness for E-Z-GO RXV Models ensures factory connector placement without stretching or tight bends.
- Use UV-rated nylon cable ties to anchor the loom securely to fixed frame members every 10 to 12 inches.
Step 3: Mount New Headlights and Rear Assemblies
If your cart has pre-existing factory cutouts, remove the mounting screws holding the old housings in place and detach the wiring plugs.
- For carts requiring new body cutouts, carefully apply painter's tape to the body panels to protect the paint, trace the provided cut templates, and make clean cuts using a rotary tool or jigsaw.
- Position the new assemblies into the body openings. Fasten the mounting bezels with stainless steel hardware, tightening evenly until the gaskets seat firmly against the cowl and rear body panels.
- Explore model-specific upgrades in our Club Car Lighting collection to find direct-fit assemblies built with impact-resistant acrylic lenses.
Step 4: Wire Brake Switches and Signal Accessories
Integrating active brake lights and turn signals enhances neighborhood safety:
- Mount the mechanical brake switch or timer delay pad near the pedal assembly.
- For Club Car setups, the Brake Light Kit Time Delay for Club Car Tempo and Precedent prevents brake lights from draining power when the cart is parked with the hill brake engaged.
- For Yamaha models, installing a Deluxe LED Factory Light Kit for Yamaha Drive delivers integrated switch gear and matched wire terminations.
Step 5: Test Circuits and Reconnect Main Terminals
Before bolting down body panels or replacing cup holders:
- Double-check all harness connections and verify that ground leads are tightly attached.
- If your kit includes auxiliary controls, verify connections to your Universal Turn Signal Kit With Brake Pad And Horn.
- Reconnect the main negative battery cable to the pack. A tiny, faint spark upon terminal contact is normal due to capacitor pre-charging, but a heavy, arching flash indicates a direct short that must be resolved before proceeding.
- Flip the Tow/Run switch back to RUN, turn on the key switch, and verify headlights, marker lights, turn signals, and brake lights in sequence.
Managing Dedicated Wiring Channels and Auxiliary Power
Installing rear lights on newer models like the 2022 Club Car Onward often presents unique routing challenges. Modern bodies use integrated plastic wire channels and enclosed rocker panels rather than open subframes. That enclosed design is precisely why splicing into one factory taillight circuit can create more work and more risk than installing a complete kit with one fresh, properly routed harness.
Planning Your Full-Kit Wiring Route
During a full-kit installation, run the new harness through the dedicated body channels as a single protected path instead of trying to chase, repair, or tap the original rear-light circuit. Use a nylon wire fish tape or flexible pull line lubricated with wire-pulling compound to guide the harness through tight cavities without stressing the body or existing wiring. Protect the new run with split wire loom, and use rubber pass-through grommets anywhere the harness crosses metal chassis plates or plastic undertrays. This approach keeps the golf cart tail light replacement part of a matched, sealed lighting system rather than a vulnerable one-light splice.
Tapping Circuits for Auxiliary and License Plate Lights
Once your complete kit is installed and its primary lighting functions are tested, you can add a lighted license plate holder or auxiliary 12V accent lights as optional accessories. These add-ons should build on the new kit's clean, protected wiring—not substitute for replacing the rear lighting system.
- Location Matters: If an accessory needs a connection, use the kit's designated accessory lead or a protected connection point near the battery compartment and controller mounting plate when the kit instructions allow it. This keeps connections away from rear-wheel road spray.
- Pinout Tracing: Confirm the kit's wiring diagram and test with a digital multimeter before connecting an accessory. Do not assume wire colors, because running-light, ground, brake, and turn-signal leads vary by kit manufacturer.
- Sealed Connections: Use heat-shrink solder-sleeve butt connectors or weather-sealed Posi-Tap connectors wrapped with heat-shrink tubing to create water-tight splices that resist road grime and vibration.
Troubleshooting Common Golf Cart Tail Light Replacement Wiring Issues
If your newly installed lights do not operate as expected, use these troubleshooting steps to quickly locate the fault:
-
No Illumination (All Lights Out):
- Check the main inline fuse on the lighting harness (commonly a 15A or 20A ATO blade fuse).
- Inspect the input and output sides of your voltage reducer with a multimeter to ensure a solid 12V output.
-
Reversed or Erractic Flashing:
- LEDs are polarity-sensitive. If an LED taillight flashes erratically or stays dark while the headlights work, verify that the positive 12V feed and negative ground leads are not reversed.
-
Brake Lights Stay On Constantly:
- Inspect the mechanical brake pedal switch. If the pedal linkage is misaligned or the internal switch plunger is stuck closed, current flows continuously to the brake circuit. Adjust the switch bracket or install a time-delay relay.
-
Dim or Flickering Lights:
- A loose ground is the leading cause of flickering LEDs. Ensure all ground leads trace back to a dedicated 12V negative bus or converter output rather than an ungrounded, painted chassis rail.
Frequently Asked Questions About Golf Cart Lighting Upgrades
How do I remove the rear light housing on a 2022 Club Car Onward?
Most owners remove the old rear light housing on a 2022 Club Car Onward as part of installing a complete cart-specific lighting kit. Removing the taillight requires more than taking out the two outer mounting screws because the wiring harness is routed through an enclosed rear channel secured by internal retention clips. To remove the assembly without marring the body panels, unscrew the exterior fasteners, gently release the internal bezel clips from inside the wheel well using a nylon pry tool, and disconnect the multi-pin quick connector located along the inner harness channel. Once the old housing is out, route the complete kit's fresh harness and install the matched rear assembly instead of treating the job as a standalone one-light fix.
What is the function of the third wire on rear light harnesses?
A standard golf cart taillight harness uses three wires to provide dual-intensity lighting:
- Wire 1 (Ground): Completes the circuit back to the negative 12V bus (commonly white or black).
- Wire 2 (Running Lights): Supplies constant 12V power for low-intensity nighttime taillights (commonly red or brown).
- Wire 3 (Brake / Turn Signal): Supplies switched 12V power for high-intensity illumination when the brake pedal is depressed or turn signals are activated (commonly blue, yellow, or white depending on the kit manufacturer).
Do 36V and 48V electric golf carts require a voltage reducer?
Yes, standard 12V light kits and standalone LED assemblies installed on 36V or 48V carts require a DC-to-DC voltage converter to step the voltage down safely. Connecting a 12V LED light directly to a 36V or 48V battery pack will immediately damage the circuit and void product warranties. Extreme Kartz carries reliable converters such as the Bolt 48V/36V to 12V High Output Reducer (SKU 33-006), the Reliance 30 Amp DC Converter 48/36 to 12V (SKU 13-030), the Eco Battery Universal 12V Converter 48V–72V (SKU A-1272), and the Bolt 50-Amp HD DC/DC 36/72V Reducer (SKU BE-50AMPR72). MadJax Ultimate Plus kits are an exception, as they include built-in voltage regulation supporting 12–48V systems.
Conclusion
Upgrading your vehicle with a complete LED lighting system transforms nighttime driving visibility, improves trail safety, and ensures all electrical components operate with minimal energy draw. By selecting cart-specific harnesses, ensuring proper 12V regulation, and securing every connection with weather-resistant terminals, you can enjoy years of dependable lighting performance.
For model-specific diagrams, technical advice, and premium kits built for your cart, explore the Extreme Kartz comprehensive guide to Club Car lighting or reach out to our team of knowledgeable cart specialists to get tailored fitment recommendations for your next upgrade. A burned-out or damaged tail light is the right moment to upgrade the whole cart with a matched, cart-specific LED kit—not simply swap one assembly.
Related Products

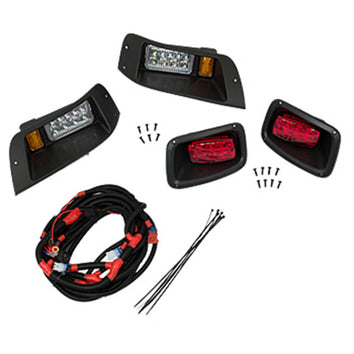
Vendor: GTW Led Light Kit, Premium Harness, EZGO TXT (1994.5-2013)

Vendor: DoubleTake Phoenix Street Legal LED Light Kit

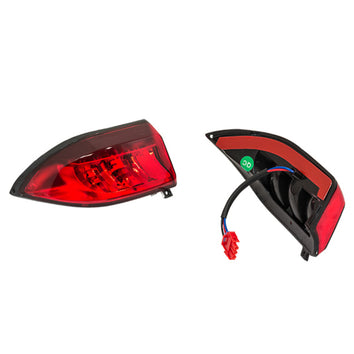
Vendor: Club Car Precedent Madjax Ultimate Plus LED Light Kit

Vendor: SGC Kit for Deluxe Light - (Brake, Horn, Turn signal and Harness)


