


A Practical Guide to Upgrading Your Club Car Precedent Radio
Choose the Right Club Car Precedent Radio Setup
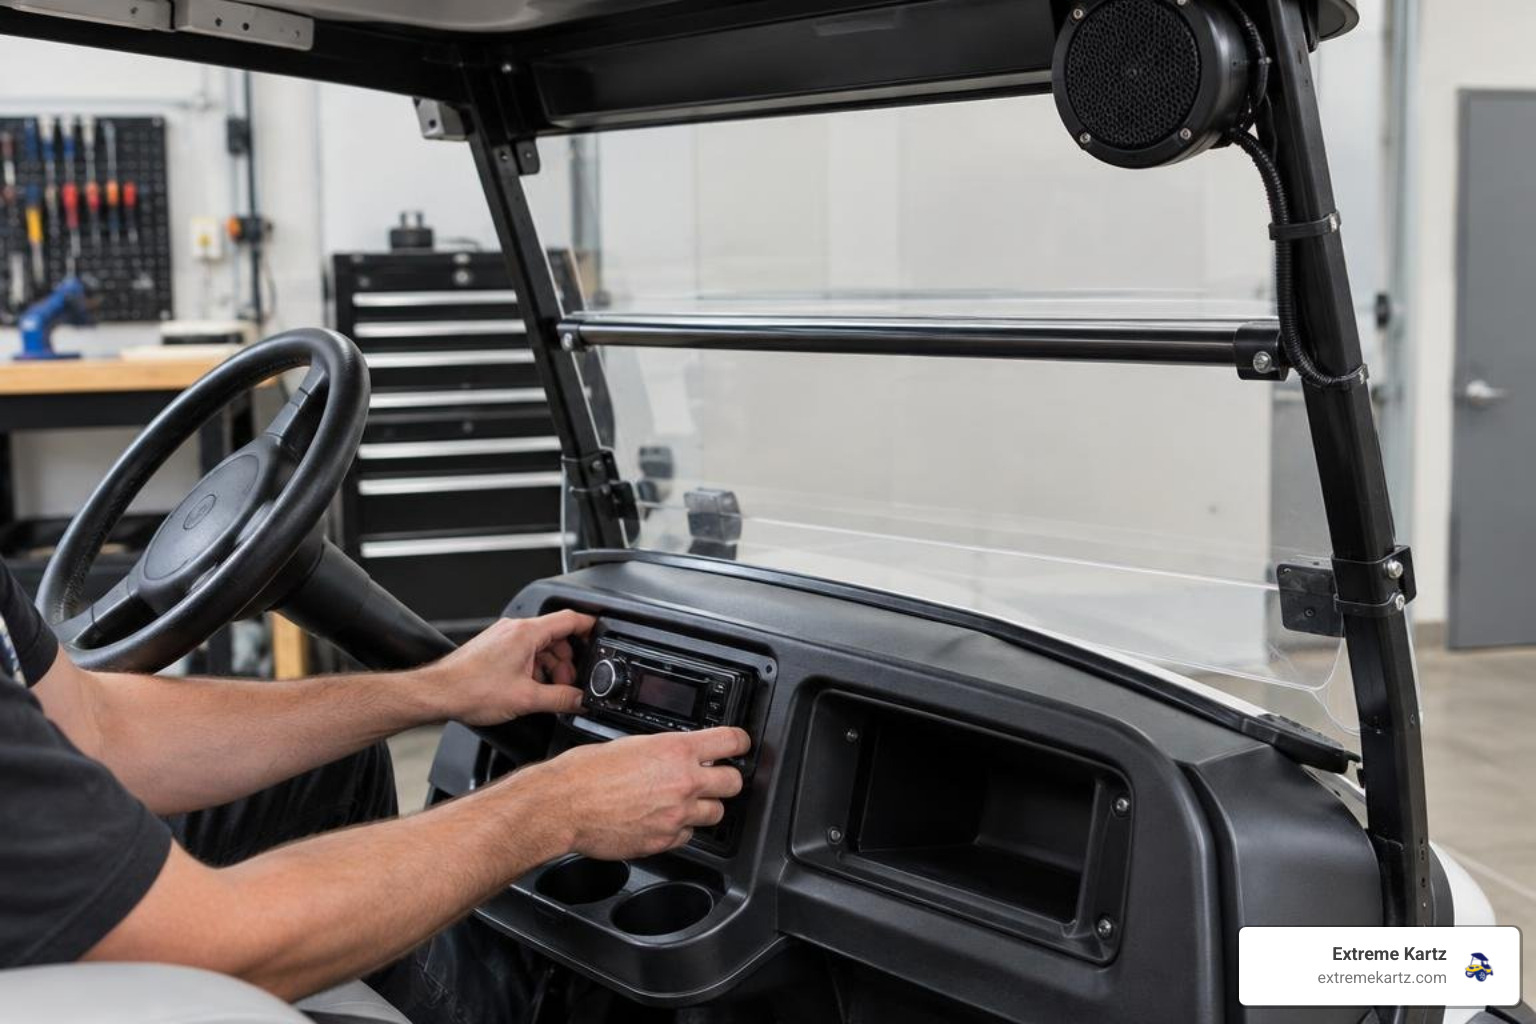
Start with your cart's model year, roof, and power system. Then choose a soundbar for a simpler installation, an overhead console to house a radio and speakers you pick, or a replacement dash for an integrated look. Before buying, check the mount and speaker openings, confirm what the kit includes, and plan a fused 12V power connection. Electric carts with 8V batteries or lithium need a 48V to 12V voltage reducer unless one is already installed. Dimensions are accurate as of publish; always confirm exact specs on the product page for your cart.
I'm Martin Davis, owner of Extreme Kartz. Our team helps cart owners match radios, speakers and 12V power to their exact cart, and this guide covers what we check first.
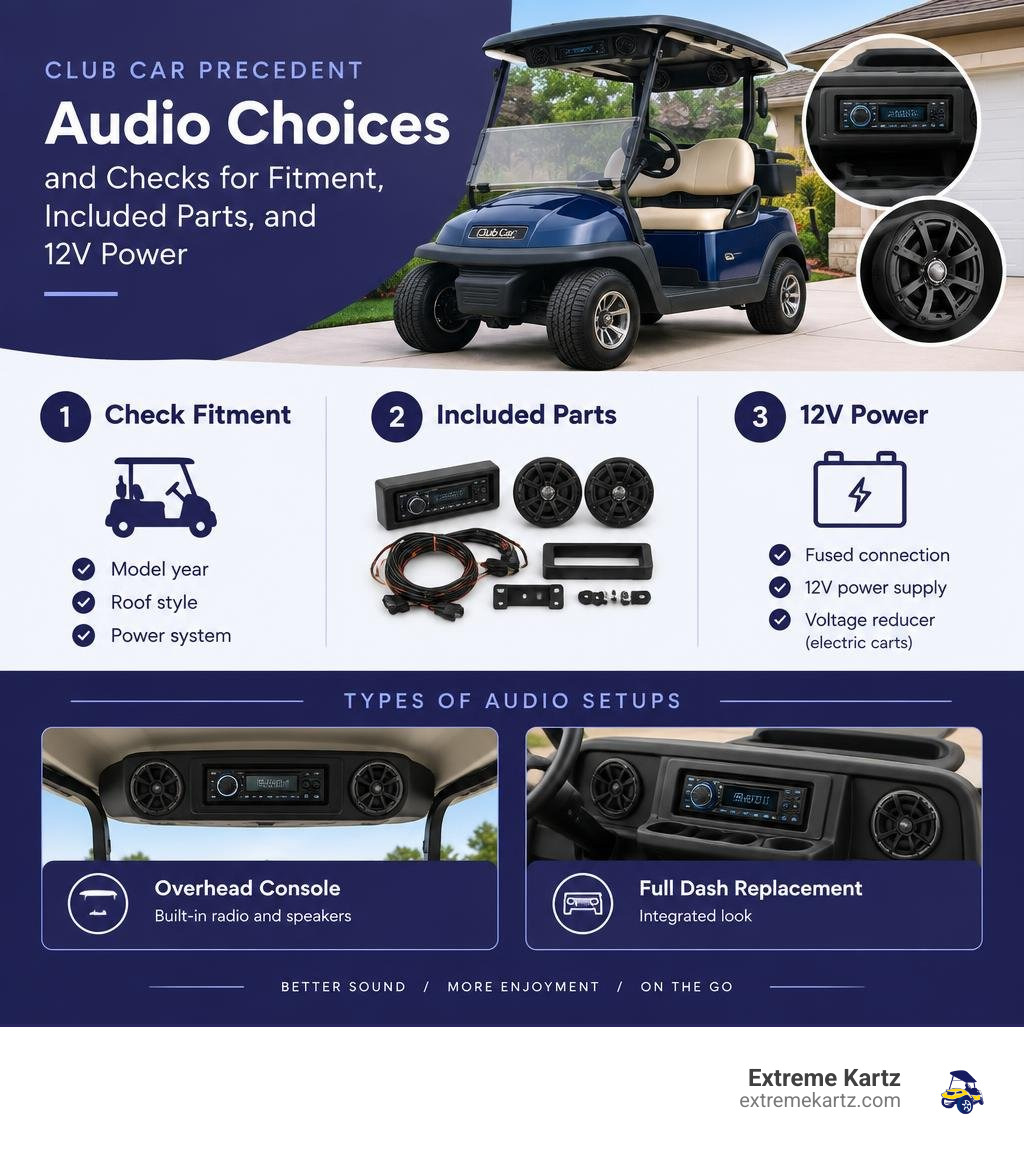
Types of Audio Setups: Selecting Your Club Car Precedent Radio
When you plan an audio upgrade, where it mounts decides how it sounds, how your dash looks and how much weather it sees. Adding quality sound lets you enjoy your favorite music, podcasts, and talk shows on the go, whether you are cruising the neighborhood or tackling work around your property.
There are three primary formats available for the Club Car Precedent: in-dash receiver assemblies, overhead roof consoles, and standalone soundbars.
Dash Replacement and In-Dash Radio Kits
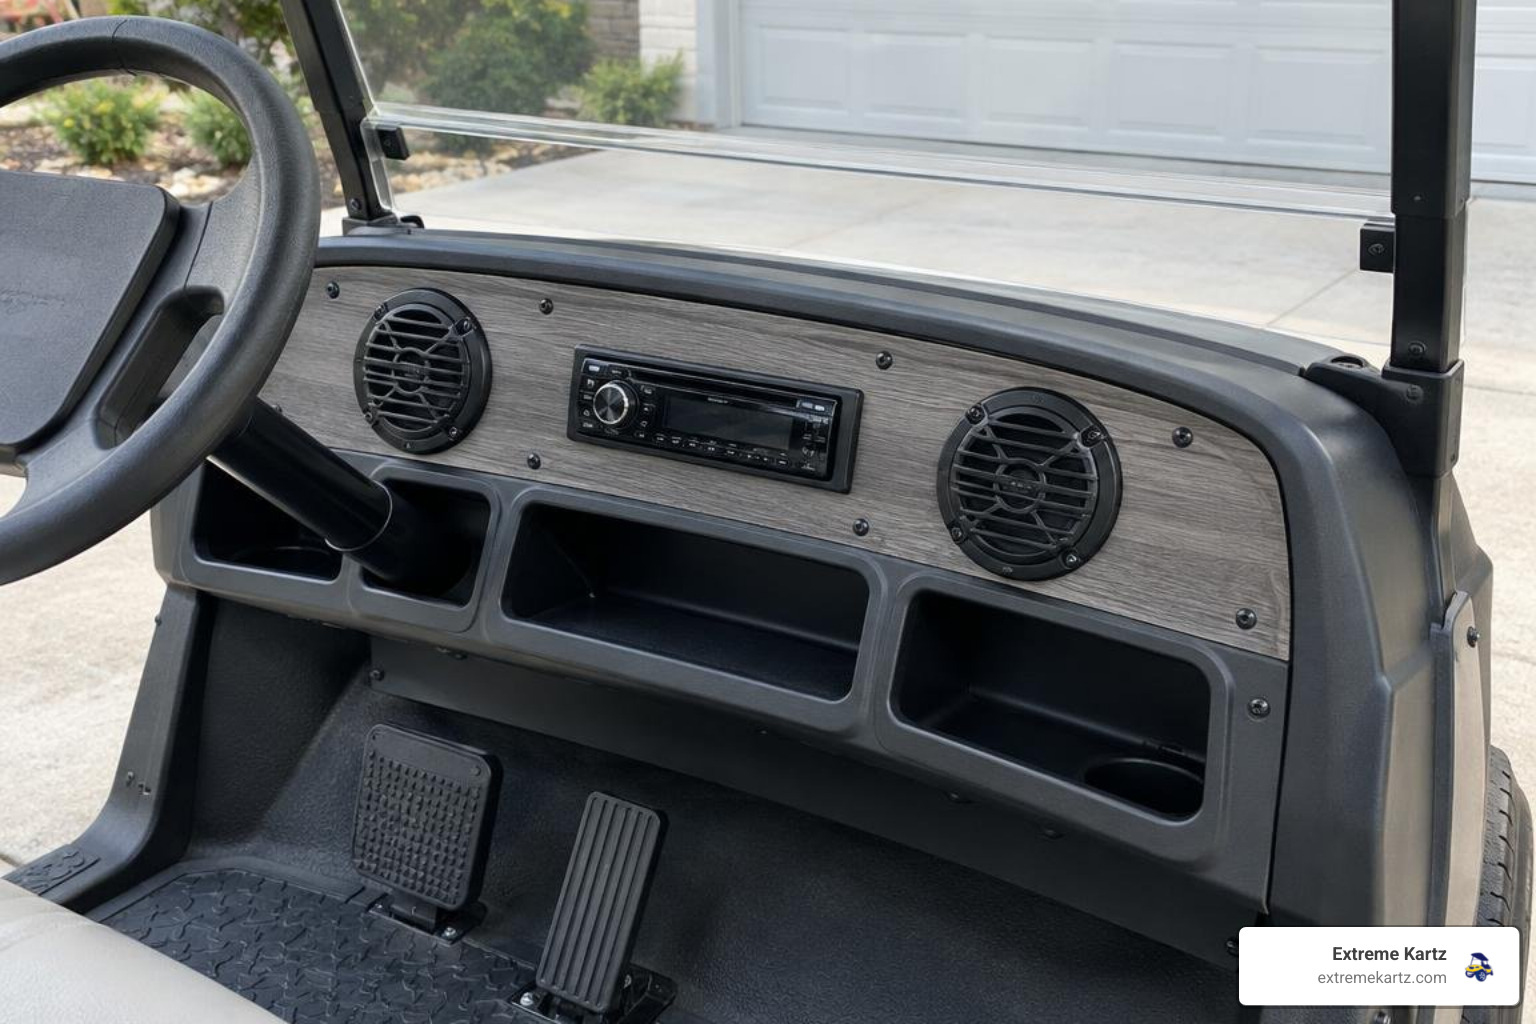
In-dash kits offer an integrated, automotive-style finish. A replacement dash puts the radio right in front of you, and some dashes add storage too. Upgrading through our custom dash interior upgrades gives your cockpit a unified look while keeping stereo controls within easy reach.
For a dash that is already cut for audio, the pre-cut audio dash in greywood finish has openings for a gauge-mount receiver and two 6.5-inch speakers, both sold separately. Send us your cart's model year and we will confirm the fit before you order.
If storage matters as much as sound, the DoubleTake Sentry dashboard fits 2004 and newer Club Car Precedent, Tempo and Onward carts, gas and electric. It adds a locking center console with integrated cup holders, and optional add-ons include speaker mounts. Our Sentry Precedent dashboard guide covers fitment and storage in detail.
Before you order, match the radio to the opening. A gauge-mount radio needs a round gauge opening, and a single-DIN receiver needs a single-DIN opening. The SoundExtreme Marine Gauge Radio + Pair 6.5-Inch Speakers kit pairs a gauge radio with two 6.5-inch speakers, the same radio style and speaker size the pre-cut greywood dash is cut for.
Overhead Radio Consoles and Roof Mounts
An overhead console moves the radio and speakers up out of the dash. The universal carbon fiber radio console works on the Club Car Precedent and has a flat base, so it mounts to a flat surface, such as a shelf that spans between the top windshield strut mount points. It measures about 11 by 25 inches, with the speaker and stereo housing about 7.5 by 22 inches, so check your head clearance before you buy.
The console is designed for 5.25-inch speakers and does not include an audio system. Plan on buying the radio or amp and the speakers separately. BOSS 5.25-inch marine speakers are one match, and you can see more in our Club Car radio and speakers collection.
Soundbars and Portable Audio Options
If you want a simpler installation with no dash work, an all-in-one soundbar is a good fit. Modern amplified soundbars mount to a crossbar or top support with a bracket or the included hardware, and they put the speakers and amplifier in one enclosure.
Our default pick is the Lithium Rhino GX500 Soundbar with T-Bracket, an 8-speaker LED soundbar made for cube or flat-edge crossbar mounting. Most stock carts do not have a rear crossbar to mount to, and that is what the T-bracket is for. Send us your model year and top style and we will confirm the mount before you order. Another good option is the Boss 26-inch six-speaker sound bar, which comes with Bluetooth and mounting hardware. If you want sound that moves from the cart to the beach, EcoExtreme 2 portable speakers are IP67 waterproof and dustproof with no wiring at all. Compare more options in our Bluetooth sound bars collection.
Dash vs. Overhead Console vs. Soundbar
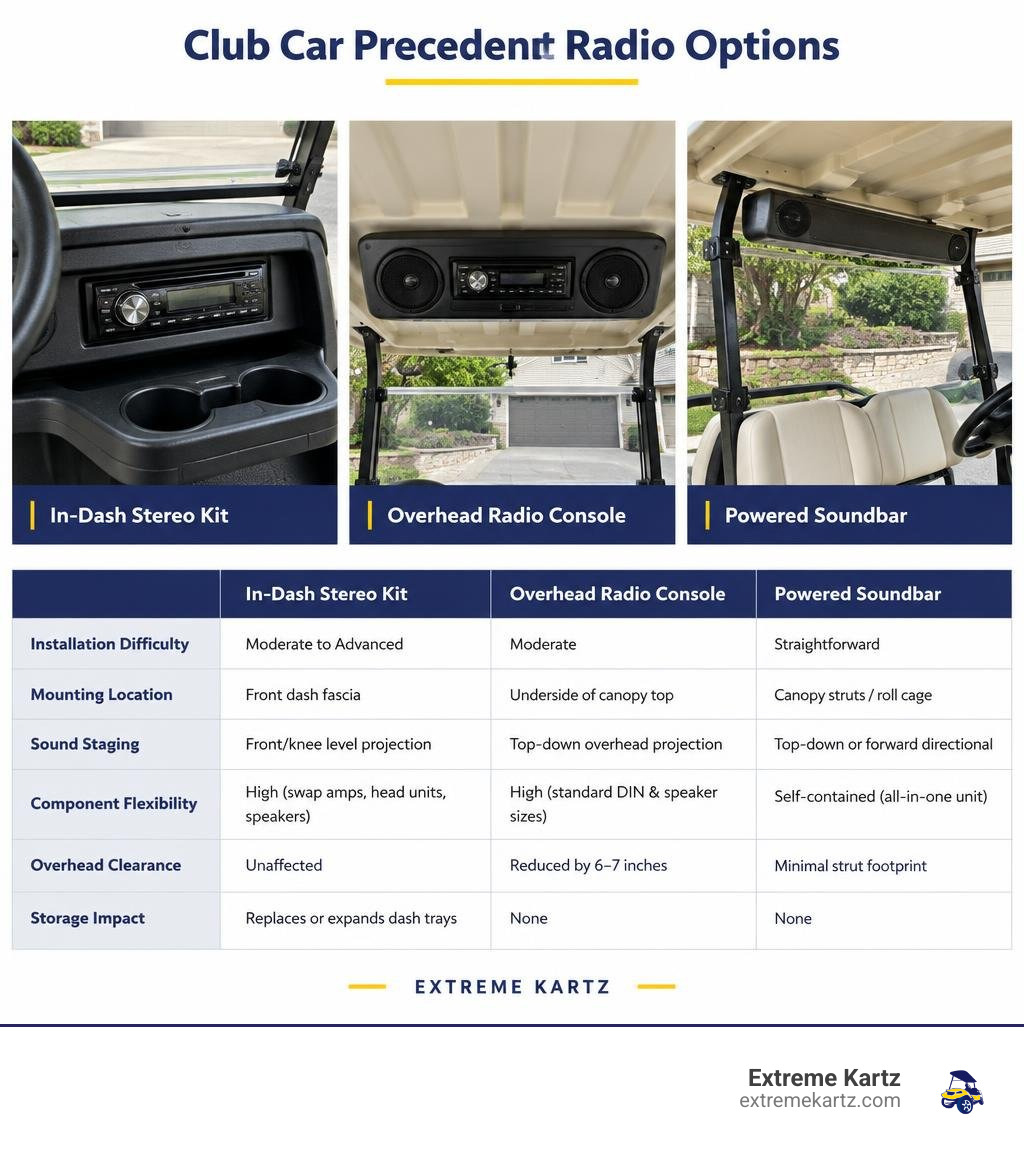
Choosing between a soundbar, an overhead console and an in-dash setup comes down to how it sounds, how much work the install takes and how it looks.
| Feature | Dash Setup | Overhead Console | Soundbar |
|---|---|---|---|
| Where It Mounts | In a pre-cut or replacement dash | On a flat surface up top, such as a shelf between the top windshield strut mounts | On a crossbar or top support |
| What Is Included | The dash. Radio and speakers are sold separately | The console. Radio or amp and speakers are sold separately | Speakers and amplifier in one unit |
| Speaker Size | Two 6.5-inch speakers on the pre-cut greywood dash | 5.25-inch speakers on the universal carbon fiber console | Built in |
| Wiring | Radio, speakers and 12V power | Radio or amp, speakers and 12V power | 12V power and ground |
| Upgrading Later | Swap one part at a time | Swap one part at a time | Replace the whole unit |
Radio Console vs. Soundbar Comparison
A console or dash setup lets you choose each part yourself: the radio or amp, the speakers and where they sit. That makes it easy to upgrade one piece later, but it means more parts to buy and more wiring. A soundbar combines the speakers and amplifier in one housing, so the wiring comes down to 12V power and ground. The tradeoff is that changing anything later means replacing the whole unit.
Precedent Fitment, Compatibility, and Power Requirements
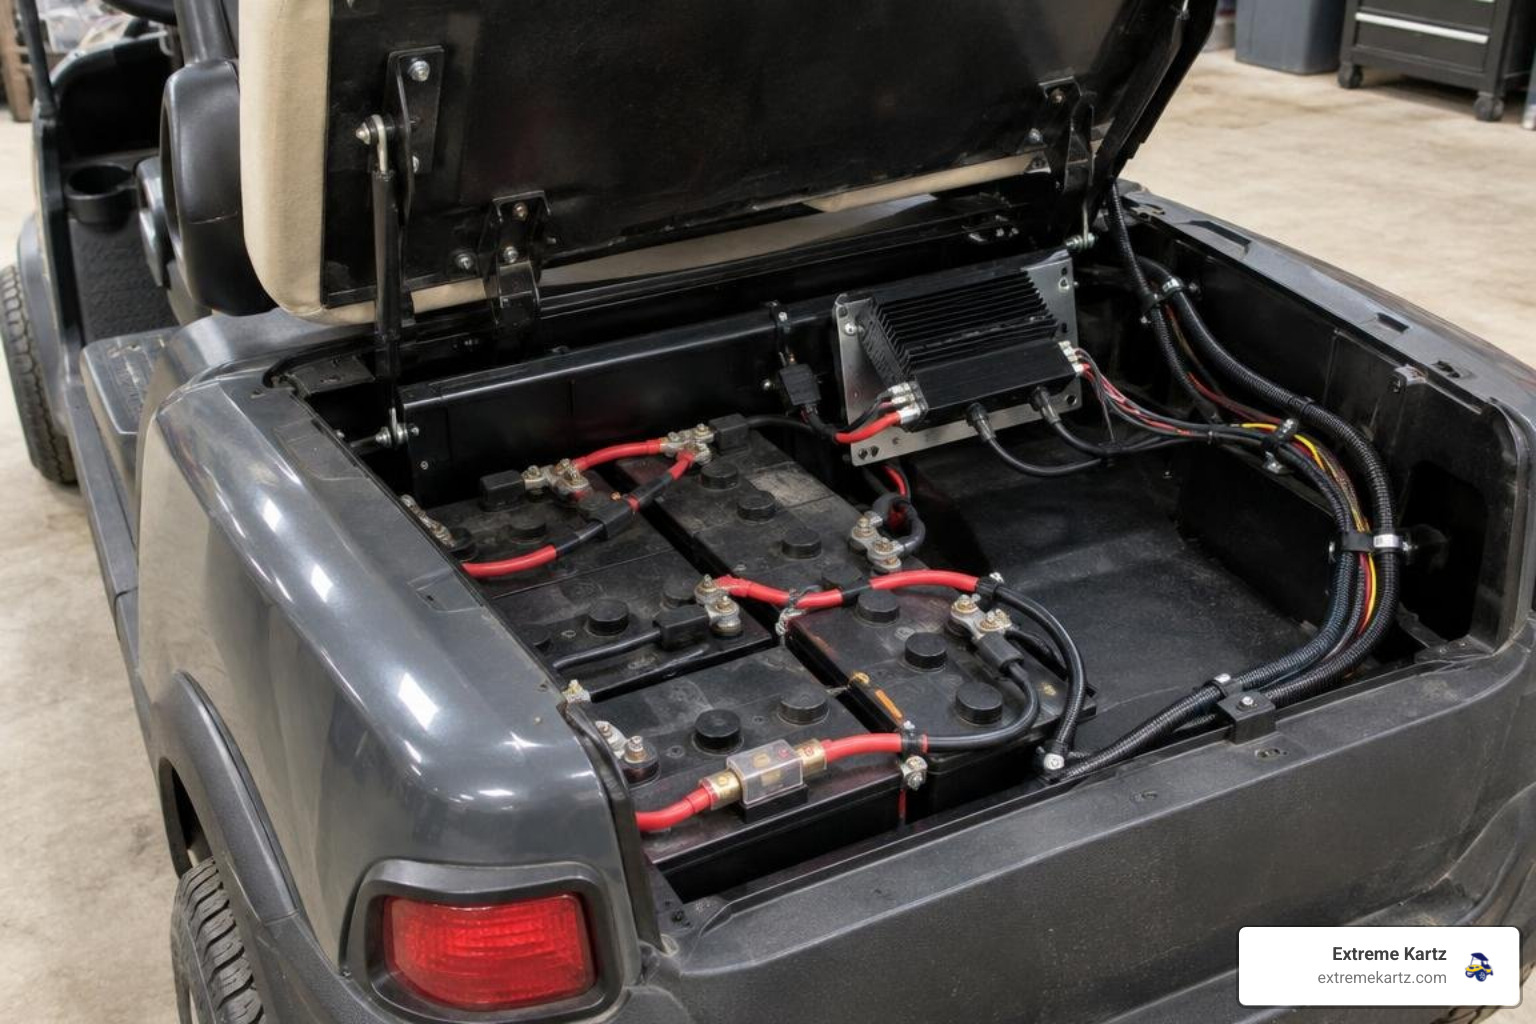
Precedent carts from 2004 on are either gas or 48V electric. A 12V radio cannot run straight off a 48V pack, so carts with 8V batteries or lithium need a 48V to 12V voltage reducer.
Electric Precedents use either six 8V batteries or four 12V batteries. Two 8V batteries put out about 16V, which is more than a 12V radio is built for. A lead-acid pack of four 12V batteries can run a 12V accessory from one battery, so ask us what fits your cart, but that tap goes away if you switch to lithium. Lithium packs have no mid-pack tap point at all, so the only correct connections are the pack's main positive and negative terminals. A voltage reducer connects to the entire pack instead of just one or two batteries, which is easier on the batteries and gives your radio a stable 12V.
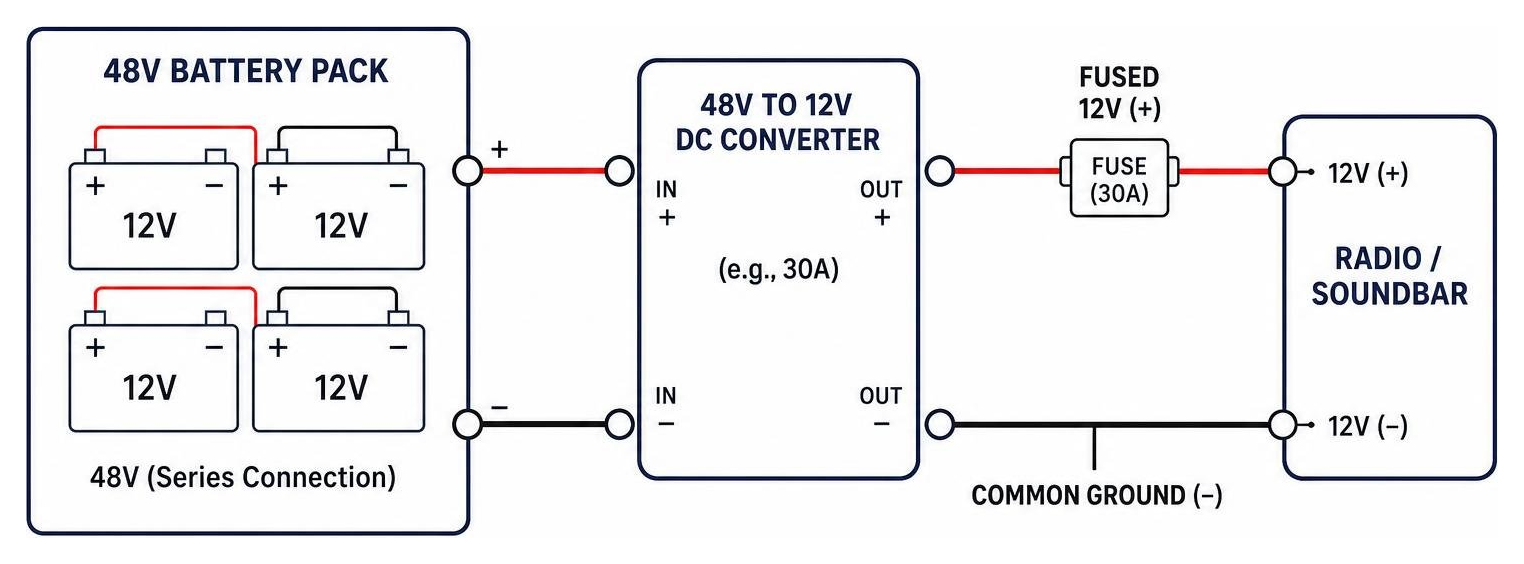
How to Wire a Club Car Precedent Radio System
To protect your electrical system and your radio, work through these steps in order:
- Size the Reducer: First total the 12V equipment you intend to run. A sound bar rated from 50W to 100W commonly uses 4A to 9A, one above 100W can use 9A to 15A, an LED light kit may use 3A to 5A, and a dual USB charger may use 1A to 2A. Add 20% headroom to that total. As an example, an 8A sound bar, 5A lights and 2A USB charger total 15A, which becomes an 18A requirement with headroom, so choose a 20A or 30A reducer. The Reliance 30 Amp DC Converter and the Bolt 48V/36V to 12V High Output Reducer suit many installations. A 48V lithium pack can reach about 58V while charging, so confirm the reducer's maximum input before buying. If the product page does not state that limit, ask us. The Red Hawk 26V-60V 30 Amp Voltage Reducer accepts 26V to 60V at 30A. The Eco Battery Universal 12V Converter accepts 40V to 90V and provides 15A continuous for smaller loads. For a large amplifier, contact us so we can help select the reducer. Browse our voltage reducers. Purchase an inline fuse holder with the reducer, since most reducers do not include one. Before wiring, also verify that the reducer includes both a trigger lead and wiring diagram. If either is missing, contact us first.
- Find Your Keyed Power Wire: Complete this check before disconnecting the battery. Park the cart, set the brake and place the forward/reverse switch in neutral. Set the multimeter to DC volts, place its black probe on battery negative, and measure the key-switch wires. The correct wire reads 0V with the key off and pack voltage with the key on. Follow our guide to installing a 12V converter and finding keyed power on a Club Car Precedent for the procedure. It carries full pack voltage, so it is never a connection point for a 12V radio lead.
- Disconnect the Main Battery: Turn the key off and set the forward/reverse switch to neutral. Take off any jewelry and put on safety glasses. With an insulated wrench, remove the main negative cable first, then the main positive cable, and tape both ends. Pack terminals stay live with the key off, so do not skip this step.
- Mount the Reducer: The most common spot is under the seat. Keep it away from the battery terminals and moving parts, and leave an air gap, because reducers make heat under load. Follow the reducer maker's mounting instructions, and ask us before you drill into the frame or battery tray.
- Add the In-Line Fuse: Install the fuse holder in the reducer's positive input lead, placing it as close to the pack positive terminal as possible, ideally within 12 inches. Use the rating specified by the reducer maker, which is commonly between 15A and 30A. The reducer must not be connected to the pack without this fuse, because leaving it out creates a fire risk.
- Connect the Input Leads: With the main cables still off, run the fused positive lead to the pack positive terminal and the negative lead to the pack negative terminal. These main leads go to the pack, not to the key switch.
- Connect the Trigger Lead: If your reducer has a separate trigger lead, connect it to the keyed power wire so the reducer shuts off with the key and the radio does not keep drawing power while the cart is parked. On the Eco Battery converter, that lead is the orange wire. Lead colors vary by reducer, so follow the diagram that came with yours.
- Plan the 12V Side: Leave the radio unconnected for now and tape the ends of the reducer's 12V leads so they cannot touch anything. You will check the reducer's output first in Step 3: Audio Tuning and Connectivity Testing. If you are powering more than one accessory, use a fused distribution block on the 12V side, and follow the fuse rating in your radio or soundbar's instructions.
Step-by-Step Installation Process
Installing an audio system on a Club Car Precedent requires basic hand tools: a cordless drill, socket set, insulated wrenches, multimeter, wire strippers, a crimper, heat-shrink connectors, zip ties, and safety glasses. Keep the main battery disconnected until Step 3: Audio Tuning and Connectivity Testing. If you skipped the wiring list above, disconnect the main battery first.
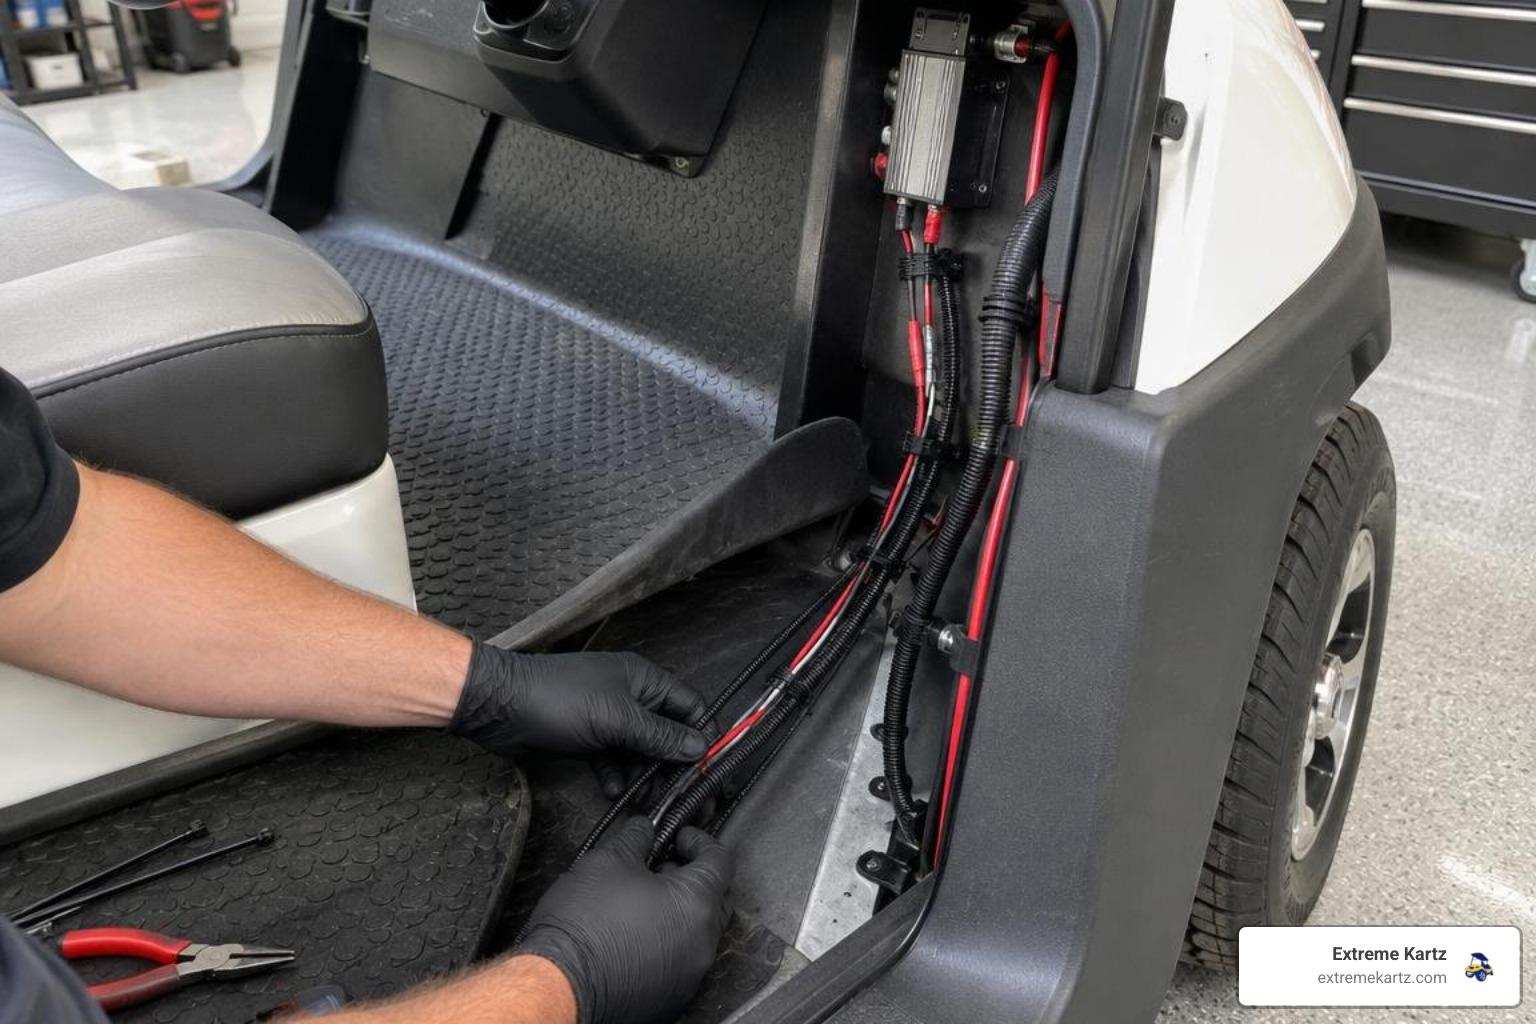
Step 1: Console or Dash Housing Preparation
- For Dash Kits: Follow the instructions included with your dash. The pre-cut greywood dash includes hardware and instructions, and its product page says it installs in under 10 minutes with standard household tools. For a DoubleTake Sentry dash, a Precedent installation video is on the product page's Resources tab.
- For Overhead Consoles: Confirm your mounting surface first. The universal carbon fiber console needs a flat surface, such as a shelf between the top windshield strut mount points. Mark your holes before you drill anything.
Step 2: Speaker Wiring
- Run speaker wire along the roof struts or under the floor mat inside protective split-loom tubing, and keep it away from moving parts and high-current cables.
- Connect speaker terminals observing correct polarity, positive to positive and negative to negative, to maintain clean bass response and avoid phase cancellation.
Step 3: Audio Tuning and Connectivity Testing
- Reconnect the main battery, positive cable first, then negative. Turn the key on and check the reducer's output with a multimeter before you connect the radio. It should read about 11.5V to 13V. If it reads pack voltage, disconnect it right away and replace the reducer. If it reads 0V, check the inline fuse first, and on a lithium pack make sure the battery is switched on. If it reads anything else, call us.
- Turn the key off, connect the radio or soundbar's power leads to the reducer's 12V output as its instructions show, then turn the key on and power it up.
- Pair your smartphone via Bluetooth to verify wireless playback range and check auxiliary or USB charging ports.
- Set a comfortable volume and adjust the bass, midrange and treble until the sound stays clean as you turn it up.
- If your system includes RGB speaker lighting, test the controller to verify that color modes switch cleanly without causing hum in the speaker channels.
- After about 10 minutes of playing, touch the reducer body briefly. It should feel warm, not too hot to hold. If it is too hot, the load is too high for that reducer or it needs more air around it.
Common Fitment Considerations
Gas and Electric Models
Gas Precedent models do not run on a 48V battery pack, so you can skip the voltage reducer steps. Follow the power and ground instructions that come with your radio or soundbar, or ask our team to confirm the connection point for your cart. On electric models, run the radio's positive and negative leads to the reducer's 12V output, never directly to the 48V pack or the key switch.
Speaker and Receiver Fitment
Before ordering, check the speaker size and mounting depth against your console or dash. The pre-cut greywood dash takes 6.5-inch speakers, and the universal carbon fiber console is designed for 5.25-inch speakers. Confirm the radio style too, because a gauge-mount radio and a single-DIN receiver need different openings.
Weather Exposure
Golf carts operate in humid, sunny and dusty outdoor environments. Look for marine-grade audio gear, and check the water-resistance rating on the product page before you buy.
Conclusion
Upgrading the audio on your Club Car Precedent adds comfort and entertainment to every drive. Match the setup, whether an overhead console, a custom dash kit or an all-in-one soundbar, to your cart's power system and model year, and the install goes much smoother.
If you have questions about choosing a voltage reducer, picking matching accessories or confirming fitment for your model, reach our team at support@extremekartz.com or 678-331-7404. Browse our Club Car radio and speakers, or read our complete guide to golf cart stereos and quick start guide to golf cart sound bars. Extreme Kartz offers free shipping on orders over $100 within the contiguous United States, excluding Hawaii, Alaska and U.S. territories. Handling time for in-stock items is generally 1 to 3 business days unless the product page says otherwise, and transit takes about 3 to 7 business days.
About the Author: Martin Davis
I'm Martin Davis, owner of Extreme Kartz, a golf cart parts and accessories store based in Tyrone, GA. We carry radios, soundbars, dashes and voltage reducers for Club Car carts. If you are not sure what fits your cart, our team can help at support@extremekartz.com or 678-331-7404.
Related Products


Vendor: Lithium Rhino-GX500 Soundbar with T-Bracket

Vendor: Club Car Precedent Pre Cut Dash for Audio Systems - Greywood Finish (Years 2004-Up)

Vendor: Radio Console, Carbon Fiber, Universal (Does not include audio system)

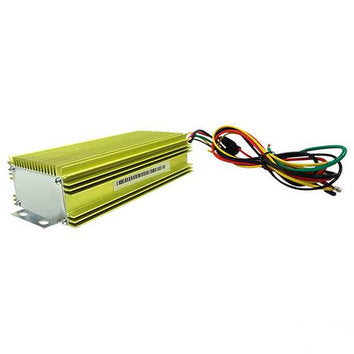
Vendor: Voltage Reducer, 26V-60V to 12V, 30 amp


