


A Practical Guide to Finding a Compatible Voltage Reducer for Golf Carts
Why You Need a Voltage Reducer for Golf Cart Electrical Systems

Modern electric golf carts operate on high-voltage DC battery packs—commonly 36V, 48V, or 72V depending on the cart and battery setup. However, nearly every aftermarket electronic accessory, from LED light bars and underglow lighting to stereo receivers and horn kits, runs on standard 12V DC power.
Connecting a 12V device directly across a high-voltage battery pack will destroy the accessory instantly due to severe overvoltage. In the past, cart owners tried to bypass this issue by tapping only two 6V batteries or one 12V battery within a multi-battery series string. Tapping single batteries causes an unequal discharge rate across the pack, which damages individual battery cells, shortens total runtime, and degrades overall battery life.
Using a dedicated voltage reducer for golf cart setups solves this issue completely. A voltage reducer, also known as a step-down converter or buck converter, draws power evenly across the entire high-voltage battery bank and steps it down safely to a clean, regulated 12V DC output. This protects your main power setup while ensuring high-performance accessories run reliably alongside components detailed in our Golf Cart Speed Controllers Guide 2026.
Understanding Pack Voltages vs. 12V Accessory Demands
When an electric golf cart operates, the total pack voltage powers the drive system, motor controller, and solenoid. Higher voltage systems deliver efficient power distribution to the motor, but standard accessory hardware cannot process high DC voltages.
A step-down reducer serves as an electrical mediator between your battery pack and your accessories:
- Balanced Battery Drain: Power is pulled equally across all batteries in the pack, avoiding cell imbalance and extending battery life.
- Stable Voltage Output: Fluctuations in main pack voltage during acceleration or hill climbing are smoothed out, delivering steady 12V power to sensitive electronics.
- Overvoltage Protection: Standard 12V controllers, LED modules, and sound systems remain isolated from the high voltage present at the battery terminals.
Choosing the Right Voltage Reducer for Golf Cart Applications
When choosing a voltage reducer for golf cart builds, start by matching the reducer’s input range to your pack voltage. Extreme Kartz carries reducer options for 36V, 48V, and 72V carts, including 36V/48V units, 36V/72V units, and universal converter options. A 48V lithium pack can charge to about 58V, and a 72V pack can charge to about 84V, so the reducer’s maximum input rating must exceed the fully charged pack voltage. For 72V builds, use a unit rated for 72V / 84V operation rather than a 26–60V universal reducer intended for 36V and 48V applications.
Next, size output amperage by adding the 12V loads you plan to run at the same time, then add about 20% headroom. Use these typical load ranges as a planning guide:
- LED Light Kit: 3 to 5 Amps
- LED Light Bar: 5 to 10 Amps
- Sound Bar, 50W–100W: 4 to 9 Amps
- Sound Bar, 100W+: 9 to 15 Amps
- Dual USB Charging Sockets: 1 to 2 Amps
- Small Fan: 2 to 3 Amps
- Horn: 0.5 to 1 Amp
- Camera: 0.5 to 1 Amp
- Heated Seat: 5 to 8 Amps
A 30A reducer covers most lighting and audio builds, while a 50A reducer is better suited for high-draw builds using large amplifiers, winches, or multiple accessories at once. If you are upgrading your battery power system to lithium batteries, explore our Lithium Golf Cart Batteries collection and confirm exact reducer and battery compatibility on each product page before ordering.
Step-by-Step Installation and Wiring Guide

Installing a voltage reducer requires basic electrical tools, care, and attention to proper pinout assignments. Before starting any work, park the cart on a level surface, flip the Tow/Run switch to the TOW position, and disconnect the main positive and negative cables from the battery bank to ensure safety.
For cart-specific wiring steps, refer to our step-by-step tutorial on How to Install a 12V Converter Find Keyed Power on a Club Car Precedent Step by Step Guide.
Here is the general step-by-step installation process:
- Mounting: Securely mount the reducer’s aluminum housing to a clean metal frame member or solid plastic body cowl using appropriate hardware. Ensure adequate airflow around the cooling fins.
- Harness Preparation: If the reducer comes with a pre-attached nylon plug that does not match your accessory plug, cut off the nylon plug and strip the wire ends by approximately 1/4 inch.
- Ground Connection: Connect the black ground wire directly to the main battery pack negative terminal or main negative terminal block.
- Input Fuse: Install an inline fuse on the reducer's positive input, between the battery pack positive terminal and the reducer. Size it to 120–150% of the reducer's rated output amps (typically 15–30A) using a waterproof ATC/ATO fuse holder. Never skip the input fuse — a shorted reducer without one can start a fire.
- Main High-Voltage Input: Connect the main positive input wire to the main battery pack positive terminal, making sure the reducer’s input range matches the cart’s fully charged pack voltage.
- Key Switch Trigger Wiring: Connect the switch/trigger wire to the switched side of your ignition key switch when the reducer model uses a remote turn-on lead, ensuring the key switch circuit matches the reducer’s trigger requirements.
- 12V Accessory Output: Connect the 12V positive output wire and 12V ground output wire directly to your fuse block, LED controller, or accessory distribution busbar.
- Final Testing: Reconnect main battery cables, switch from TOW to RUN, turn the key switch ON, and verify 12V output with a digital multimeter before switching on accessories.
Wiring Main Power and 12V Accessory Output
The primary wiring harness on a step-down converter may include distinct color-coded leads split between high-voltage input and 12V output sides. Always follow the wiring diagram for the exact reducer model you are installing.
- High-Voltage DC Input Positive: Connects to the main positive terminal of your battery pack through the required inline fuse.
- System Ground / Input Negative: Connects to the main battery pack negative terminal. On many common converters, input ground and output ground share a common internal ground plane.
- 12V Positive Output Lead: Delivers steady 12VDC power out to your 12V fuse box or directly to your LED controller / accessory power harness.
- 12V Negative Output Lead: Provides the return path for 12V accessories.
Always use appropriate gauge wire for the reducer’s rated output and heat-shrink crimp connectors to ensure corrosion-resistant electrical contacts.
Wiring the Trigger Wire on a Voltage Reducer for Golf Cart Accessories
A common issue cart owners face is parasitic drain—when a voltage reducer continuously draws idle current even when the cart is parked, draining the battery pack over time. Many voltage reducers include a remote trigger / switch circuit that turns the reducer on only when the cart is keyed on.
When wiring a trigger wire to a key switch, verify with a voltmeter that the switch circuit matches the reducer’s required trigger voltage. If your cart lacks a key switch or uses an isolated low-voltage switch circuit, connect the trigger wire according to the reducer manufacturer’s instructions, ideally through an inline mechanical rocker switch so you can turn off the reducer manually when storing the cart.
Technical Specs, Safety, and Support Considerations

Understanding input range, amperage capacity, heat dissipation requirements, and electrical safety practices ensures long-term reliability for your cart upgrade.
Extreme Kartz carries several reducer options for different cart setups, including 36V/48V, 36V/72V, and universal converter styles. Match the reducer to your cart’s pack voltage, confirm that its maximum input rating exceeds the fully charged pack voltage, and check the current product page for exact specifications before ordering.
Buyer’s Guide: Input Range and Output Capacity
The reducer’s input range is the first compatibility checkpoint. A 36V cart needs a reducer rated for 36V operation, a 48V cart needs a reducer that can handle the fully charged voltage of a 48V pack, and a 72V cart needs a unit rated for 72V / 84V operation. Do not assume that every “universal” reducer is safe for 72V carts; a 26–60V universal unit covers 36V and 48V packs, but not a fully charged 72V pack.
Output amperage is the second checkpoint. Add the current draw of your lights, USB ports, sound bar, horn, camera, fan, or other 12V accessories, then add 20% headroom. For many carts, a 30A reducer is enough for lighting plus audio. A 50A reducer is the better choice for high-draw builds such as large amplifier systems, winches, or multiple accessories operating together.
Dimensions, prices, and model-specific specs cited on product pages are accurate as of publish; please confirm exact specs and current details on the product page for your cart.
If you run into issues during installation, consult our troubleshooting guide on How to Troubleshoot Common Golf Cart Electrical Issues.
Pre-Installation Testing and Voltmeter Safety
Working with high DC voltages present in golf cart battery banks requires care. High DC currents can produce strong electrical arcs if short-circuited.
- Always Disconnect Power: Place the cart in TOW mode and remove the main positive wire from the battery pack before stripping wires or making terminal connections.
- Verify Voltages with a Multimeter: Measure across the battery bank to confirm total pack voltage and fully charged voltage are compatible with the reducer’s input range.
- Check Key Switch Voltage: Measure voltage at the key switch terminal before connecting any trigger wire to ensure it matches the reducer’s wiring requirements.
- Install the Input Fuse: Use an inline fuse on the reducer’s positive input lead between battery positive and the reducer.
- Insulate Connections: Use marine-grade heat-shrink tubing over all crimp terminals and butt connectors to prevent exposed copper from touching metal frame rails.
Casing Material and Support Limits
The physical construction of a voltage reducer for golf cart setups must withstand vibration, moisture, and elevated temperatures under the seat or cowl.
- Durable Casing: Choose a reducer with a durable casing suitable for golf cart vibration, moisture, and under-seat heat.
- Airflow Considerations: Mount the unit in an area with adequate ambient ventilation. Avoid burying the unit beneath tight rubber matting or insulation.
- Support and Disclaimer: Reducers are electrical components used for custom lighting and accessory installs. Always double-check wire polarity, fuse placement, input voltage, and total amp loads before powering up your system, and confirm product-specific warranty or support details on the product page.
Frequently Asked Questions

How do I know which input range I need?
Match the reducer’s input range to your cart’s pack voltage and fully charged voltage. A 48V lithium pack can charge to about 58V, while a 72V pack can charge to about 84V. That means the reducer’s maximum input rating must exceed the fully charged pack voltage, not just the nominal pack label.
What 12V devices can be powered by a golf cart voltage reducer?
A properly sized step-down converter can power many common 12V accessory packages:
- Multi-zone RGB LED lighting setups and underbody / accent LED lighting kits
- Standard LED headlight, taillight, and turn signal kits
- Marine-grade Bluetooth audio speakers and head units
- Horn kits, side mirror turn indicators, and USB fast chargers
- Auxiliary dash displays, interior dome lights, cameras, and low-draw 12V fans
Add the combined draw of all simultaneous accessories, then add 20% headroom before choosing the reducer amperage.
What warranty and technical support apply to this reducer?
Warranty and support details can vary by reducer model. Review the current product page for model-specific coverage, confirm your cart voltage and accessory load before ordering, and test all leads with a digital voltmeter before applying full load.
Final Guidance for Selecting Your Voltage Reducer
Installing a high-quality voltage reducer for golf cart upgrades is one of the smartest electrical improvements you can make. By converting main battery pack power down to a stable 12V DC output, you protect your battery bank from uneven cell drain while providing clean power for all your favorite accessories.
When preparing your electrical upgrades, calculate your total continuous current demands, add 20% headroom, confirm your pack voltage and fully charged voltage, and wire the input fuse and key switch trigger properly to reduce electrical risk and parasitic battery drain.
At Extreme Kartz, we specialize in comprehensive golf cart performance upgrades, custom accessories, and complete electrical solutions tailored for Club Car, E-Z-GO, and Yamaha carts. Most orders ship in 1–3 business days. For reducer fitment help, explore our complete selection of voltage reducers or reach out to our team for recommendations.
About the author
Martin Davis, owner of Extreme Kartz. Extreme Kartz specializes in golf cart parts, accessories, and complete electrical solutions for Club Car, E-Z-GO, and Yamaha carts, with a certified lithium technician on staff.
Related Products

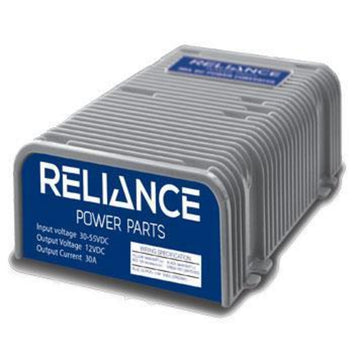
Vendor: Reliance 30 Amp Dc Converter 48/36-12Volts

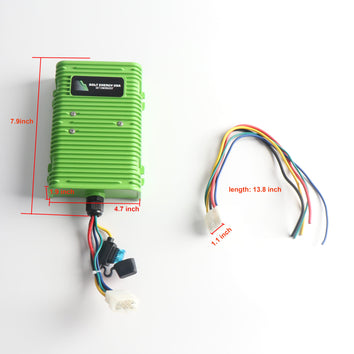
Vendor: 48V/36V to 12V High Output Reducer - by Bolt


Vendor: Eco Battery Universal 12v Converter for 48v-72v Batteries

Vendor: Bedrock Battery 12v Converter for 48v / 72v Golf Carts


