How to Change your Golf Cart Wheels & Tires: A Step-by-Step Guide
Are you ready to give your trusty golf cart a fresh new look or improve its performance? Changing your golf cart’s wheels and tires might seem like a daunting task, but with the right tools and guidance, it’s a project you can tackle yourself. In this comprehensive guide, we’ll walk you through the process step-by-step, ensuring you can upgrade your ride safely and efficiently.
Required Tools and Materials
Before you start, gather these essential items:
- Floor jack or car jack
- Jack stands (optional, but recommended for extra safety)
- Socket wrench set or impact drill set
- Screwdriver
- Wheel chocks
- Work gloves
- Safety glasses
Having these tools on hand will make the job much easier and safer. Remember, it’s always better to be over-prepared than to realize you’re missing a crucial tool halfway through the project!
Safety Precautions
Your safety should always be the top priority when working on your golf cart. Follow these important steps:
- Choose a flat, stable surface to work on
- Engage the parking brake
- Chock the wheels you’re not working on
- Wear safety glasses and work gloves
- Never rely solely on a jack to support the golf cart
Taking these precautions will help prevent accidents and ensure a smooth wheel-changing process.
Preparation Steps
Now that you’re geared up and ready to go, let’s prepare your golf cart:
- Position your golf cart in a well-lit, spacious area
- Remove the hubcaps (if present) using a screwdriver
- Loosen the lug nuts slightly, but don’t remove them completely yet
Pro tip: Loosening the lug nuts while the wheel is still on the ground makes it easier to break them free without spinning the wheel.
Jacking Up the Golf Cart
It’s time to get your golf cart off the ground:
- Locate the proper jacking points (usually near the leaf spring plates)
- Position the jack securely under the jacking point
- Slowly raise the golf cart until the wheel is off the ground
- If using jack stands, place them under secure points on the frame
Remember, never put any part of your body under the golf cart while it’s supported only by a jack!
Removing the Old Wheels and Tires

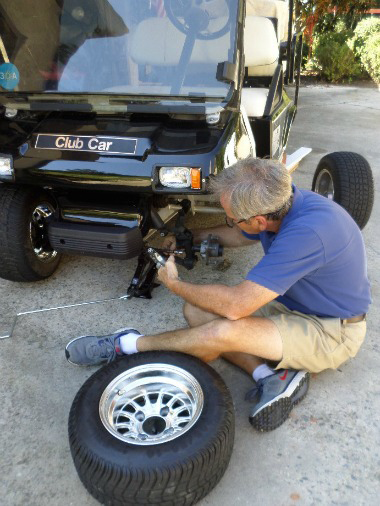
With your golf cart safely elevated, you can now remove the old wheels:
- Finish removing the loosened lug nuts
- Carefully pull the wheel and tire assembly off the hub
- Set the old wheel aside
While the wheel is off, take a moment to inspect the hub, brake components, and suspension parts for any signs of wear or damage.
Installing the New Wheels and Tires
Now comes the exciting part – putting on your new wheels and tires:
- If your new wheels have push-through center caps, install them from the back of the wheel
- Lift the new wheel and tire assembly onto the hub
- Hand-tighten the lug nuts to hold the wheel in place
- Use a star or cross pattern to tighten the lug nuts with your wrench
Pro tip: Don’t fully tighten the lug nuts yet – we’ll do that once the cart is back on the ground.
Finalizing the Installation
You’re almost done! Let’s finish up:
- Carefully lower the golf cart back to the ground
- Remove the jack and jack stands
- Use your wrench to give the lug nuts a final tightening, again using a star pattern
- Double-check that the wheel doesn’t wobble
Congratulations! You’ve successfully installed your new golf cart wheel and tire.
Post-Installation Steps and Maintenance

To ensure your new wheels and tires perform their best:
- Take a slow test drive to check for any unusual noises or vibrations
- Check and adjust tire pressure to the manufacturer’s recommendations
- Re-check lug nut tightness after about 50 miles of driving
Regular maintenance will help your new wheels and tires last longer and perform better.
Troubleshooting Common Issues
If you encounter any problems, here are some quick fixes:
- Wheel wobble: Double-check lug nut tightness and ensure the wheel is seated properly on the hub
- Uneven tire wear: Check your alignment and tire pressure
- Unusual noises: Inspect for loose components or debris caught in the wheel
If you’re unsure about any issues, don’t hesitate to consult a professional.
Conclusion
Changing your golf cart’s wheels and tires is a satisfying DIY project that can breathe new life into your ride. By following this guide, you’ve not only saved money but also gained valuable knowledge about your golf cart’s maintenance.
Remember, practice makes perfect, and with each wheel change, you’ll become more confident in your abilities. If you have any questions or want to share your wheel-changing experiences, we’d love to hear from you in the comments below!
Happy golfing, and enjoy your newly upgraded cart!


